评审代码
代码评审组件开发需求分析
我们需要开发一个基于AI的代码自动评审功能,该功能能够在用户提交代码到指定仓库时,自动完成以下操作:
- 获取代码提交的相关信息。
- 将这些信息发送给AI进行分析和总结。
- 将AI的评审结果写入指定仓库,并推送给相关用户。
核心功能需求
在每次代码提交后,系统需要获取以下关键信息:
- 仓库名:当前代码所在的仓库名称。
- 提交分支:代码提交的具体分支名称。
- 提交者:代码的提交者姓名或邮箱。
- 提交日期:代码提交的时间。
- 提交记录:包括提交的描述信息(commit message)以及具体的代码变更内容。 系统将上述信息发送给AI服务进行评审。AI完成分析后,系统会将评审结果以文件的形式写入目标仓库,并通知相关用户。
开发阶段规划
第一阶段:本地实现
- 在本地环境中搭建代码评审组件的基础功能。
- 实现以下核心能力:
- 捕获代码提交事件并提取所需信息(仓库名、分支、提交者、提交日期、提交记录等)。
- 调用 AI 接口对提交内容进行分析,并生成评审报告。
- 将AI的评审结果保存到指定仓库,并推送到远程仓库。
- 确保整个流程可以在本地运行并通过测试。
第二阶段:扩展为可配置的工具
- 提供一个可安装的插件或脚本,其他用户可以轻松集成到自己的开发环境中。
- 用户可以通过简单的配置(如指定仓库地址、分支、AI 接口等),快速启用代码评审功能。
- 支持多用户场景,允许用户拉取评审结果或通过通知方式(如邮件、IM 工具)接收评审报告。
预期效果
- 自动化评审:减少人工评审的工作量,提高代码质量。
- 实时反馈:每次提交后,开发者能够快速收到 AI 的评审建议。
- 易用性:通过简单的配置即可实现功能,适合个人开发者和团队使用。
技术要点
- Git 集成: 使用 Git 或 JGit 库捕获代码提交事件,提取相关信息。
- AI 接口调用: 设计与 AI 服务的交互逻辑,传递代码及提交信息,并接收评审结果。
- 结果存储与推送: 将评审结果写入目标仓库,并通过适当的方式通知用户(如 PR 注释、邮件等)。
- 扩展性: 提供灵活的配置选项,支持不同用户的个性化需求。
通过以上设计,我们希望打造一个高效、易用的代码评审工具,帮助开发者提升代码质量和开发效率。
本地实现代码评审
1. 基础环境配置
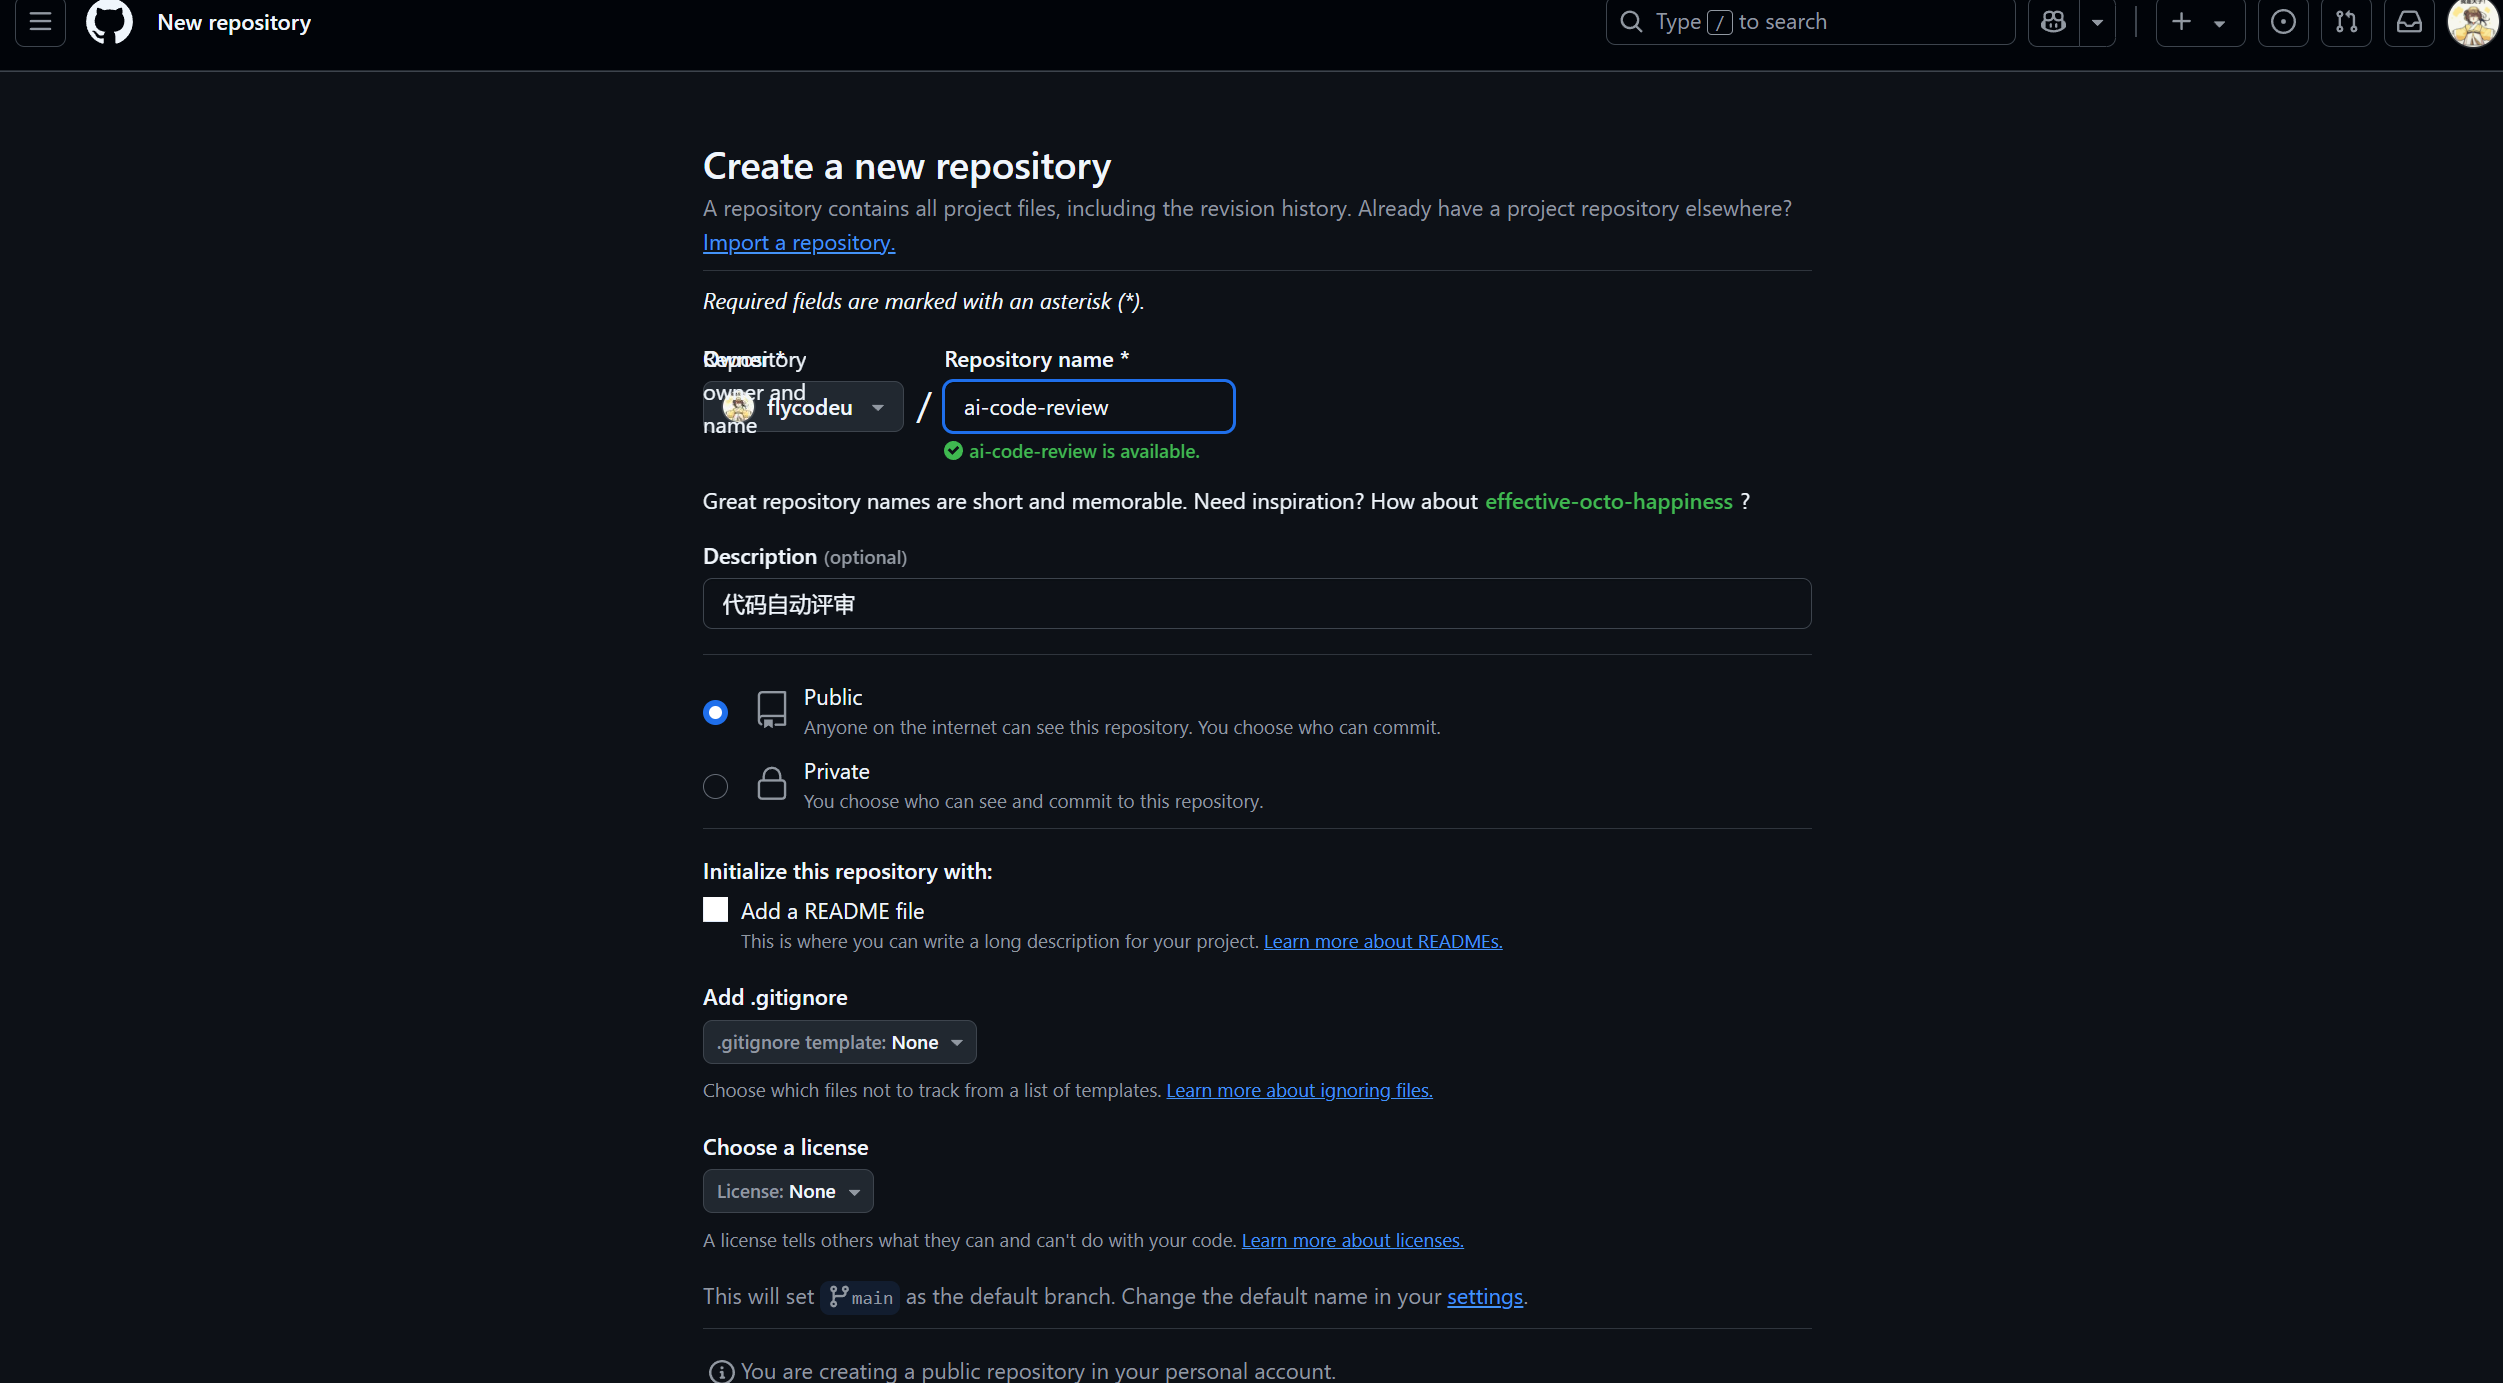
Github创建空项目
首先在GitHub上创建一个新的空项目。
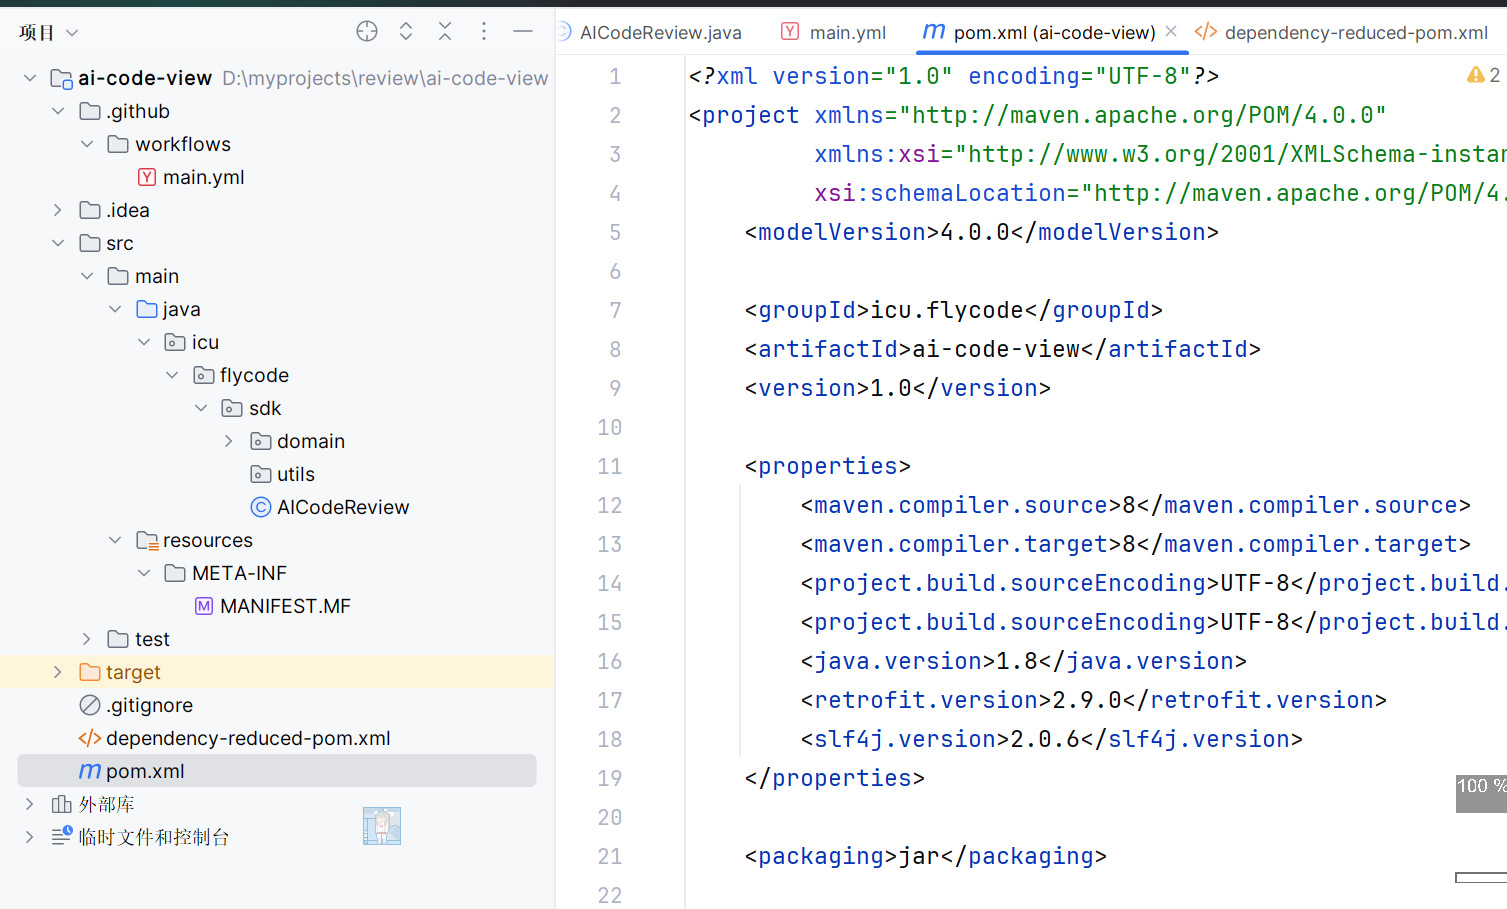
创建Maven项目
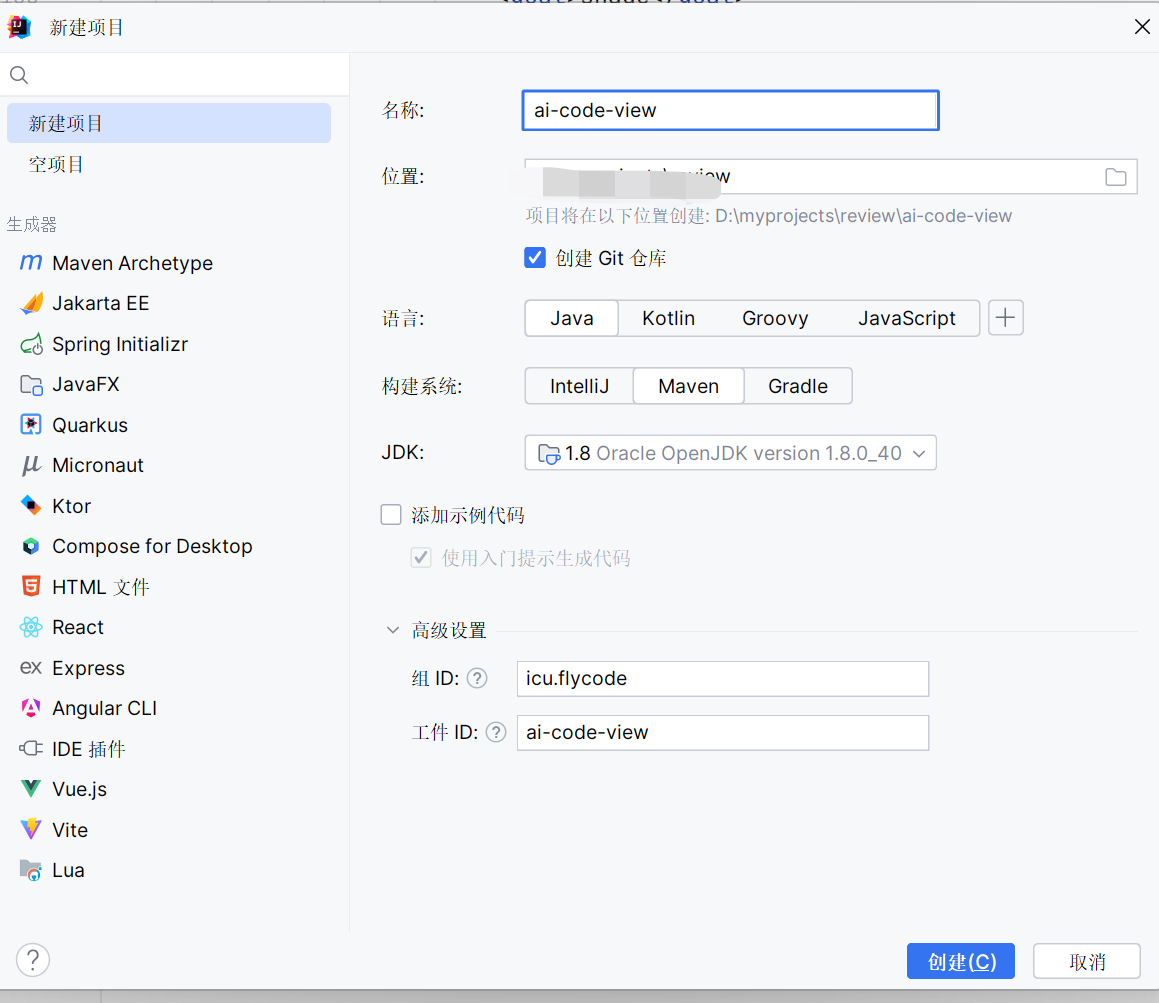
引入依赖
接着,在本地使用Maven初始化一个Java项目,并确保项目的pom.xml文件中正确引入了所有必要的依赖项,例如:
    <dependencies>
        <dependency>
            <groupId>org.slf4j</groupId>
            <artifactId>slf4j-api</artifactId>
            <version>2.0.9</version>
        </dependency>
        <dependency>
            <groupId>org.slf4j</groupId>
            <artifactId>slf4j-simple</artifactId>
            <version>2.0.6</version>
        </dependency>
        <dependency>
            <groupId>junit</groupId>
            <artifactId>junit</artifactId>
            <version>4.13.2</version>
            <scope>test</scope>
        </dependency>
        <dependency>
            <groupId>com.alibaba.fastjson2</groupId>
            <artifactId>fastjson2</artifactId>
            <version>2.0.49</version>
        </dependency>
        <dependency>
            <groupId>com.google.guava</groupId>
            <artifactId>guava</artifactId>
            <version>32.1.2-jre</version>
        </dependency>
        <dependency>
            <groupId>com.auth0</groupId>
            <artifactId>java-jwt</artifactId>
            <version>4.2.2</version>
        </dependency>
        <dependency>
            <groupId>com.fasterxml.jackson.core</groupId>
            <artifactId>jackson-core</artifactId>
            <version>2.13.3</version>
        </dependency>
        <dependency>
            <groupId>com.fasterxml.jackson.core</groupId>
            <artifactId>jackson-databind</artifactId>
            <version>2.13.3</version>
        </dependency>
        <dependency>
            <groupId>com.fasterxml.jackson.core</groupId>
            <artifactId>jackson-annotations</artifactId>
            <version>2.13.3</version>
        </dependency>
        <dependency>
            <groupId>org.eclipse.jgit</groupId>
            <artifactId>org.eclipse.jgit</artifactId>
            <version>5.13.0.202109080827-r</version>
        </dependency>
             <dependency>
            <groupId>org.projectlombok</groupId>
            <artifactId>lombok</artifactId>
            <version>1.18.34</version>
        </dependency>
    </dependencies>
打包方式
<build>
        <resources>
            <resource>
                <directory>src/main/resources</directory>
                <filtering>true</filtering>
                <includes>
                    <include>**/**</include>
                </includes>
            </resource>
        </resources>
        <testResources>
            <testResource>
                <directory>src/test/resources</directory>
                <filtering>true</filtering>
                <includes>
                    <include>**/**</include>
                </includes>
            </testResource>
        </testResources>
        <plugins>
            <plugin>
                <groupId>org.apache.maven.plugins</groupId>
                <artifactId>maven-surefire-plugin</artifactId>
                <version>2.22.2</version>
                <configuration>
                    <skipTests>true</skipTests>
                </configuration>
            </plugin>
            <plugin>
                <groupId>org.apache.maven.plugins</groupId>
                <artifactId>maven-jar-plugin</artifactId>
                <version>3.2.0</version>
                <configuration>
                    <archive>
                        <manifest>
                            <addDefaultImplementationEntries>true</addDefaultImplementationEntries>
                            <mainClass>icu.flycode.sdk.OpenAiCodeReview</mainClass>
                        </manifest>
                    </archive>
                </configuration>
            </plugin>
            <plugin>
                <groupId>org.apache.maven.plugins</groupId>
                <artifactId>maven-shade-plugin</artifactId>
                <version>3.4.1</version>
                <executions>
                    <execution>
                        <phase>package</phase>
                        <goals>
                            <goal>shade</goal>
                        </goals>
                    </execution>
                </executions>
                <!-- 如果你用了三方jar,不想一个个确定的引入,可以去掉 configuration 以及以内的配置,这样会全部打包 -->
                <configuration>
                     <filters>
                        <filter>
                            <artifact>*:*</artifact>
                            <excludes>
                                <exclude>META-INF/*.SF</exclude>
                                <exclude>META-INF/*.DSA</exclude>
                                <exclude>META-INF/*.RSA</exclude>
                            </excludes>
                        </filter>
                    </filters>
                    <artifactSet>
                        <includes>
                            <include>com.google.guava:guava:jar:</include>
                            <include>com.alibaba.fastjson2:fastjson2:jar:</include>
                            <include>org.slf4j:slf4j-api:jar:</include>
                            <include>org.slf4j:slf4j-simple:jar:</include>
                            <include>com.auth0:java-jwt:jar:</include>
                            <include>com.fasterxml.jackson.core:jackson-core:</include>
                            <include>com.fasterxml.jackson.core:jackson-databind:</include>
                            <include>com.fasterxml.jackson.core:jackson-annotations:</include>
                            <include>org.eclipse.jgit:org.eclipse.jgit:</include>
                        </includes>
                    </artifactSet>
                </configuration>
            </plugin>
        </plugins>
    </build>
创建核心文件入口
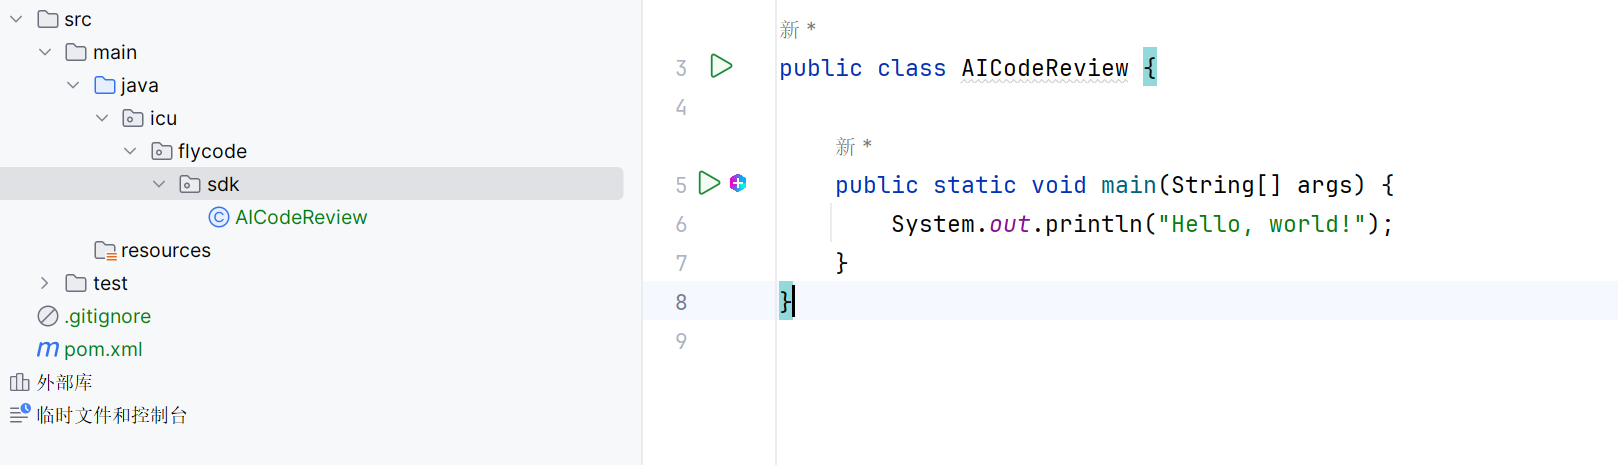
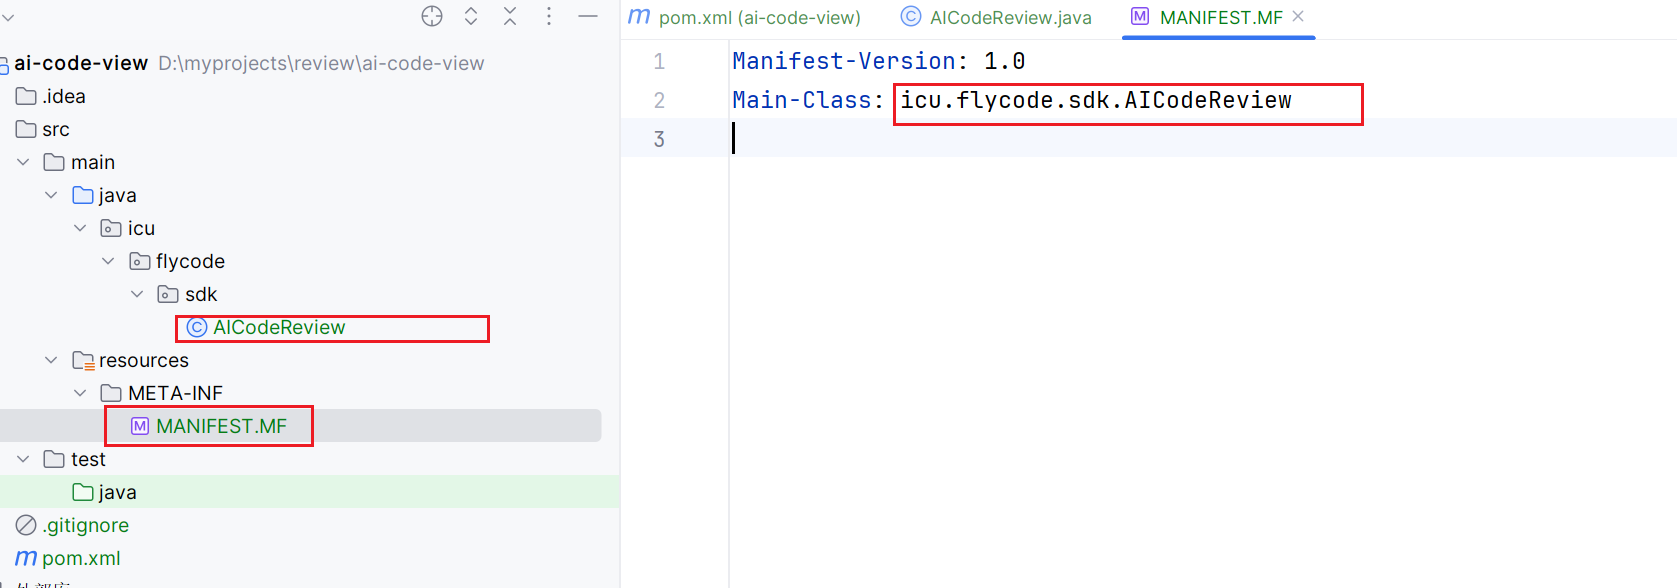
配置Manifest
需要在resources里面创建Meta-inf文件夹,里面添加文件MANIFEST.MF文件,配置sdk的版本号、主类等相关信息
关联本地Maven项目和Github项目
将修改的文件爱in都提交到Github上面去

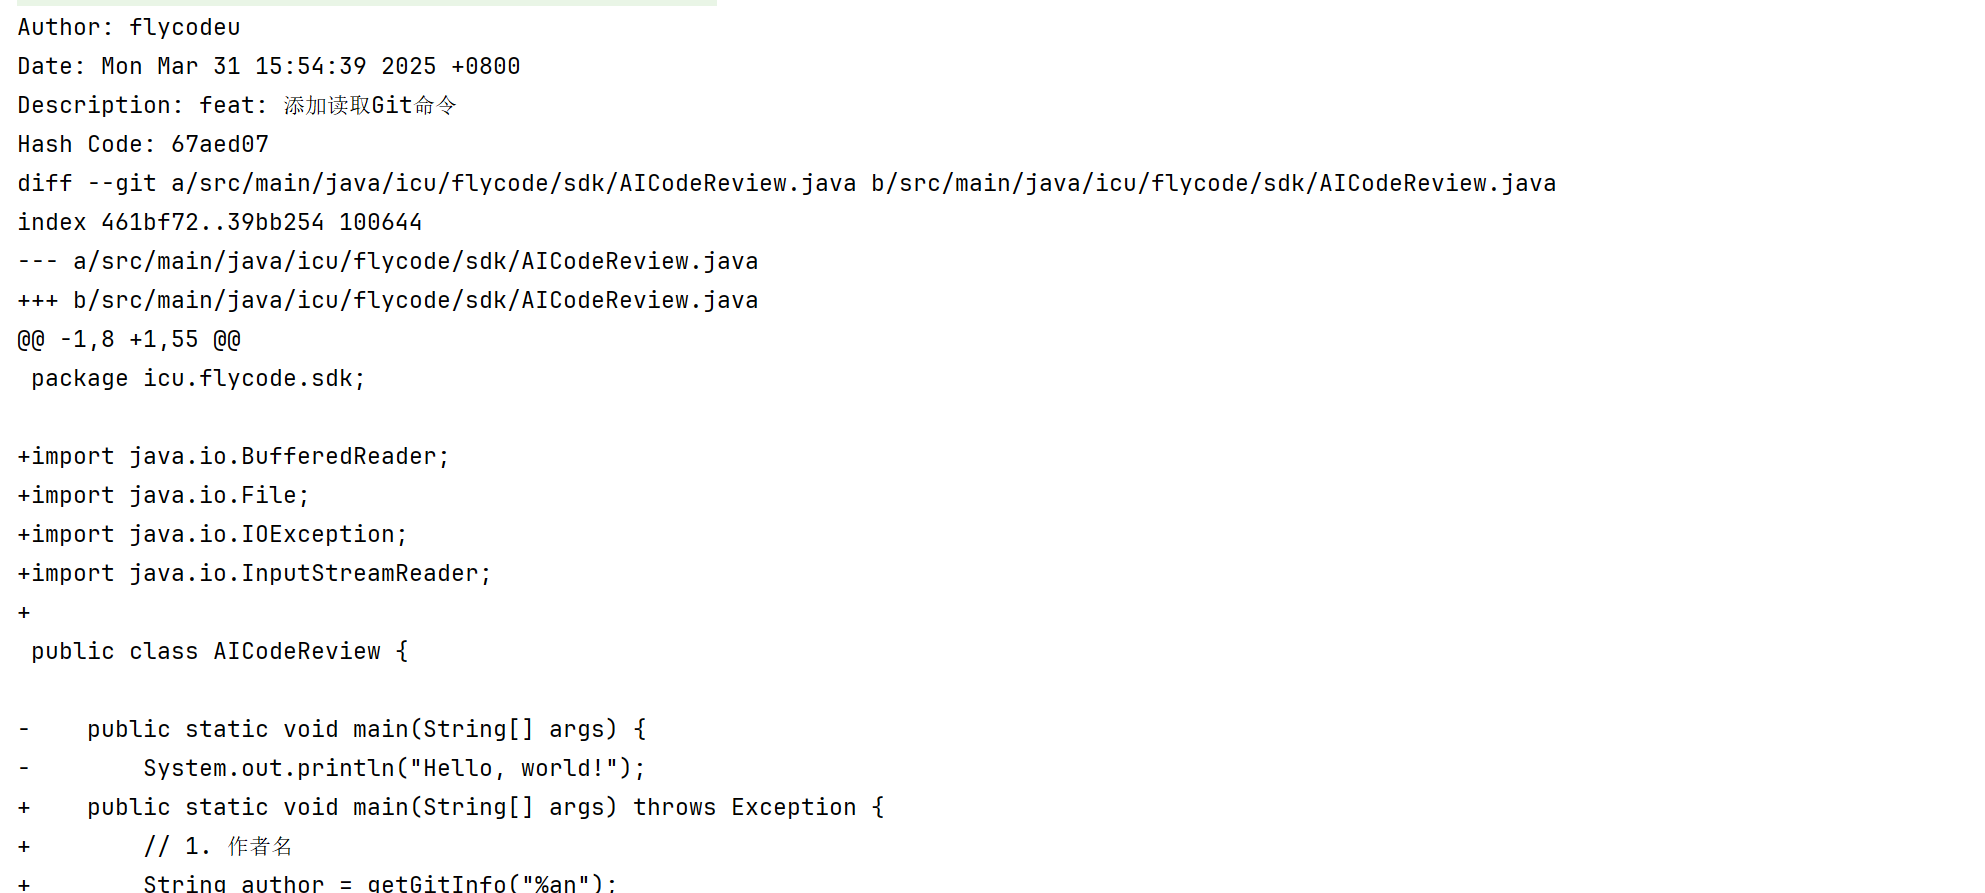
2. 读取Git配置信息
public class AICodeReview {

    public static void main(String[] args) throws Exception {
        // 1. 作者名
        String author = getGitInfo("%an");
        System.out.println("Author: " + author);
        // 2. 日期
        String date = getGitInfo("%cd");
        System.out.println("Date: " + date);
        // 3. 描述
        String description = getGitInfo("%s");
        System.out.println("Description: " + description);
        // 4. 哈希值,用于获取提交代码
        String hashCode = getGitInfo("%h");
        System.out.println("Hash Code: " + hashCode);

        // 5. 获取提交代码
        String diffCode = getDiffCode(hashCode);
        System.out.println(diffCode);
    }


    public static String getGitInfo(String tags) throws IOException {
        ProcessBuilder logProcessBuilder = new ProcessBuilder("git", "log", "-1", "--pretty=format:" + tags);
        logProcessBuilder.directory(new File("."));
        Process logProcess = logProcessBuilder.start();
        BufferedReader logReader = new BufferedReader(new InputStreamReader(logProcess.getInputStream()));
        return logReader.readLine();
    }

    public static String getDiffCode(String lastCommitHash) throws Exception {
        ProcessBuilder diffProcessBuilder = new ProcessBuilder("git", "diff", lastCommitHash + "^", lastCommitHash);
        diffProcessBuilder.directory(new File("."));
        Process process = diffProcessBuilder.start();
        BufferedReader diffReader = new BufferedReader(new InputStreamReader(process.getInputStream()));
        String line;
        StringBuilder processOutput = new StringBuilder();
        while ((line = diffReader.readLine()) != null) {
            processOutput.append(line).append("\n");
        }
        int exitCode = process.waitFor();
        if (exitCode != 0) {
            throw new Exception("Diff process exited with code " + exitCode);
        }
        return processOutput.toString();
    }
}
提交后,可以看到如下信息
3. 代码提交AI评审
我们这里采用deepseek接口,官方文档如下:https://api-docs.deepseek.com/zh-cn/
curl https://api.deepseek.com/chat/completions \
  -H "Content-Type: application/json" \
  -H "Authorization: Bearer <DeepSeek API Key>" \
  -d '{
        "model": "deepseek-chat",
        "messages": [
          {"role": "system", "content": "You are a helpful assistant."},
          {"role": "user", "content": "Hello!"}
        ],
        "stream": false
      }'
我们需要在https://platform.deepseek.com/api_keys里面创建自己的密钥。
构建请求与处理响应:根据DeepSeek API要求构造HTTP请求,并解析返回的数据。
根据以上格式,我们可以创建如下实体类。
1. 模型信息
我们可以定义模型枚举类,可以灵活的切换模型。
public enum Model {

    DEEPSEEK_CHAT("deepseek-chat","DeepSeeChat")
    ;
    private final String code;
    private final String info;

    Model(String code, String info) {
        this.code = code;
        this.info = info;
    }

    public String getCode() {
        return code;
    }

    public String getInfo() {
        return info;
    }
}
2. 预设信息
里面包含role和content,可以设置ai的角色和内容
@Data
@AllArgsConstructor
public class Prompt {

    private String role;

    private String content;
}
3. 整合模型和预设信息
/**
 * 构造发送内容
 */
@Data
public class ChatCompletionRequest {
    private String model = Model.DEEPSEEK_CHAT.getCode();
    private List<Prompt> messages;
}
4. 获取AI代码评审
需要按照之前的CURL的格式发送请求
    private static String getCodeReview(String apiKey,String diffCode) throws Exception {
        // 1. 获取key

        // 2. 建立连接
        URL url = new URL("https://api.deepseek.com/chat/completions");
        HttpURLConnection connection = (HttpURLConnection) url.openConnection();
        connection.setRequestMethod("POST");
        connection.setRequestProperty("Content-Type", "application/json");
        connection.setRequestProperty("Authorization", "Bearer " + apiKey);
        connection.setDoOutput(true);

        // 3. 发送请求
        ChatCompletionRequest chatCompletionRequest = new ChatCompletionRequest();
        chatCompletionRequest.setModel(Model.DEEPSEEK_CHAT.getCode());
        chatCompletionRequest.setMessages(new ArrayList<Prompt>() {
            {
                add(new Prompt("user", "你是一个高级编程架构师,精通各类场景方案、架构设计和编程语言请,请您根据git diff记录,对代码做出评审。代码为: "));
                add(new Prompt("user", diffCode));
            }
        });

        // 4. 获取返回
        try (OutputStream os = connection.getOutputStream()) {
            byte[] input = JSON.toJSONString(chatCompletionRequest).getBytes(StandardCharsets.UTF_8);
            os.write(input, 0, input.length);
        }

        int responseCode = connection.getResponseCode();
        System.out.println(responseCode);

        BufferedReader bufferedReader = new BufferedReader(new InputStreamReader(connection.getInputStream()));
        String line;
        StringBuilder content = new StringBuilder();
        while ((line = bufferedReader.readLine()) != null) {
            content.append(line);
        }

        bufferedReader.close();
        connection.disconnect();

        System.out.println(content);
        return content;
    }
5. 测试
        // 5. 获取提交代码
		String apiKey = "xxxx";
        String diffCode = getDiffCode(apiKey,hashCode);
        System.out.println(diffCode);

        // 6. 代码评审
        String codeReview = getCodeReview(diffCode);
很明显,如今的数据返回了很多目前无效的数据,我们需要提取出message里面的content数据,这才是我们需要的数据。
6. 添加返回实体类
我们需要设计一个实体,可以读取content里面的内容。
{
  "id": "5a90f553-11ec-4096-914c-2cefcdcb0f1a",
  "object": "chat.completion",
  "created": 1743467088,
  "model": "deepseek-chat",
  "choices": [
    {
      "index": 0,
      "message": {
        "role": "assistant",
        "content": "# "
      }
    }
  ]
}
@Data
public class ChatCompletionSyncResponse {
private String id;
private String object;
private String created;
private String model;
private List<Choices> choices;
@Data
public class Choices {
private Integer index;
private Message message;
@Data
public class Message {
private String role;
private String content;
}
}
}7. 解析返回数据
修改获取AI代码评审代码,添加如下代码
// 解析数据
ChatCompletionSyncResponse chatCompletionSyncResponse = JSON.parseObject(content.toString(), ChatCompletionSyncResponse.class);
// 我们需要的数据
String returnContent = chatCompletionSyncResponse.getChoices().get(0).getMessage().getContent();
        System.out.println(returnContent);
目前已经实现本地的代码评审,AI能够读取本地提交的历史文件,然后输出内容。
4. 编写日志
每次启动项目,都会生成一次代码评审内容,如果不保存这些数据,我们就无法记录历史提交记录,但是我们目前不需要使用数据库存储,而是采用GitHub的仓库进行存储。
1. 获取Github的token
使用这个token,可以让我们操控Github指定仓库,执行读写操作。
https://github.com/settings/tokens

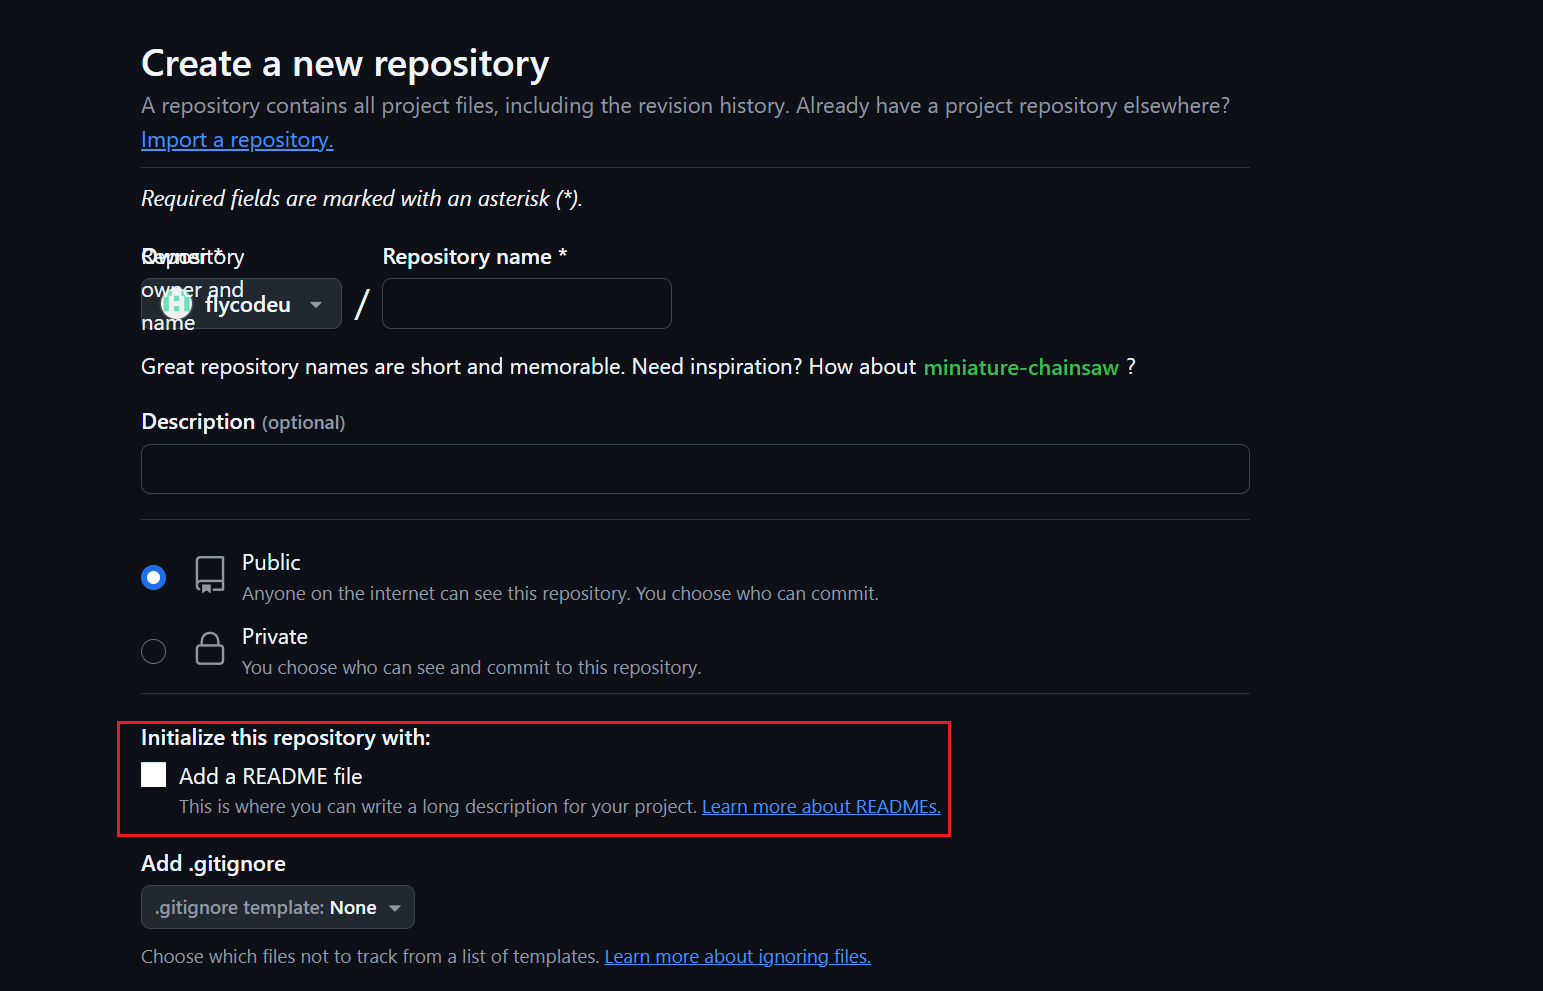
2. 创建空的日志仓库
一定要加入README文件,仓库必须要是公开的,否则无法执行读写功能。
3. 写入日志
    private static String writeLogs(String token, String log) throws Exception {
        // 1. 创建Git对象
        Git git = Git.cloneRepository()
                .setURI("https://github.com/flycodeu/openai-code-review-logs.git")
                .setDirectory(new File("repo"))
                .setCredentialsProvider(new UsernamePasswordCredentialsProvider(token, ""))
                .call();


        // 2. 创建文件夹
        String dateFolderName = new SimpleDateFormat("yyyy-MM-dd").format(new Date());
        File dateFolder = new File("repo/" + dateFolderName);
        if (!dateFolder.exists()) {
            dateFolder.mkdirs();
        }

        // 3. 创建文件
        String fileName = System.currentTimeMillis() + ".md";
        File file = new File(dateFolder, fileName);
        // 4. 写入日志
        try (FileWriter writer = new FileWriter(file)) {
            writer.write(log);
        }

        // 5. 提交、推送文件到仓库
        git.add().addFilepattern(dateFolderName + "/" + fileName).call();
        git.commit().setMessage("Add " + fileName).call();
        git.push().setCredentialsProvider(new UsernamePasswordCredentialsProvider(token, "")).call();

        // 6. 返回提交地址
        return "https://github.com/flycodeu/openai-code-review-logs/blob/master/" + dateFolderName + "/" + fileName;
    }
但是目前这个代码是无法在本地测试的,我们需要借助GitHub的事件流。
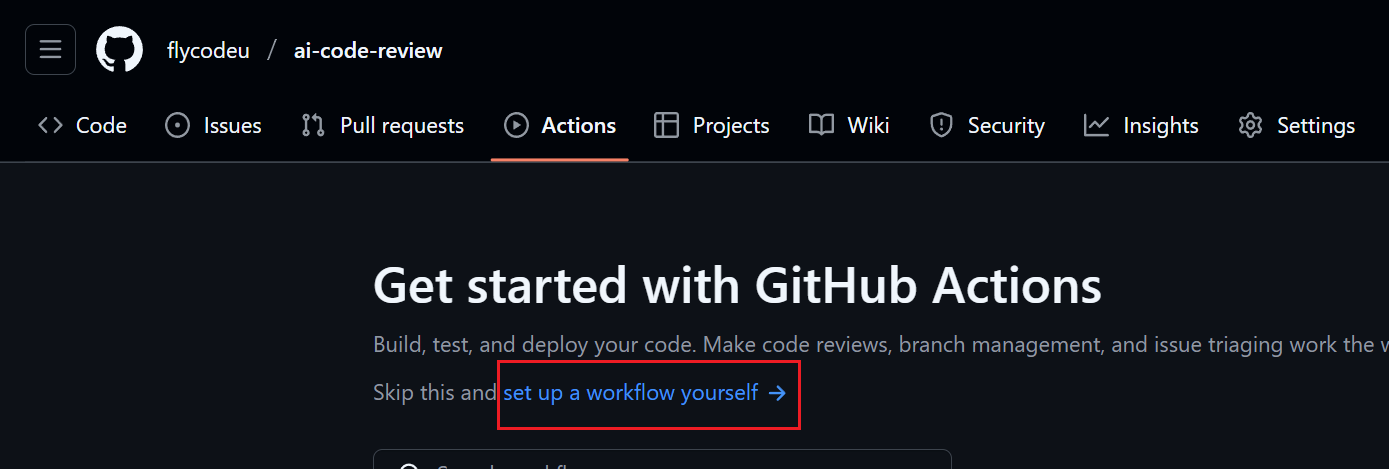
5. GitHub事件流
1. 创建Actions拉取到本地
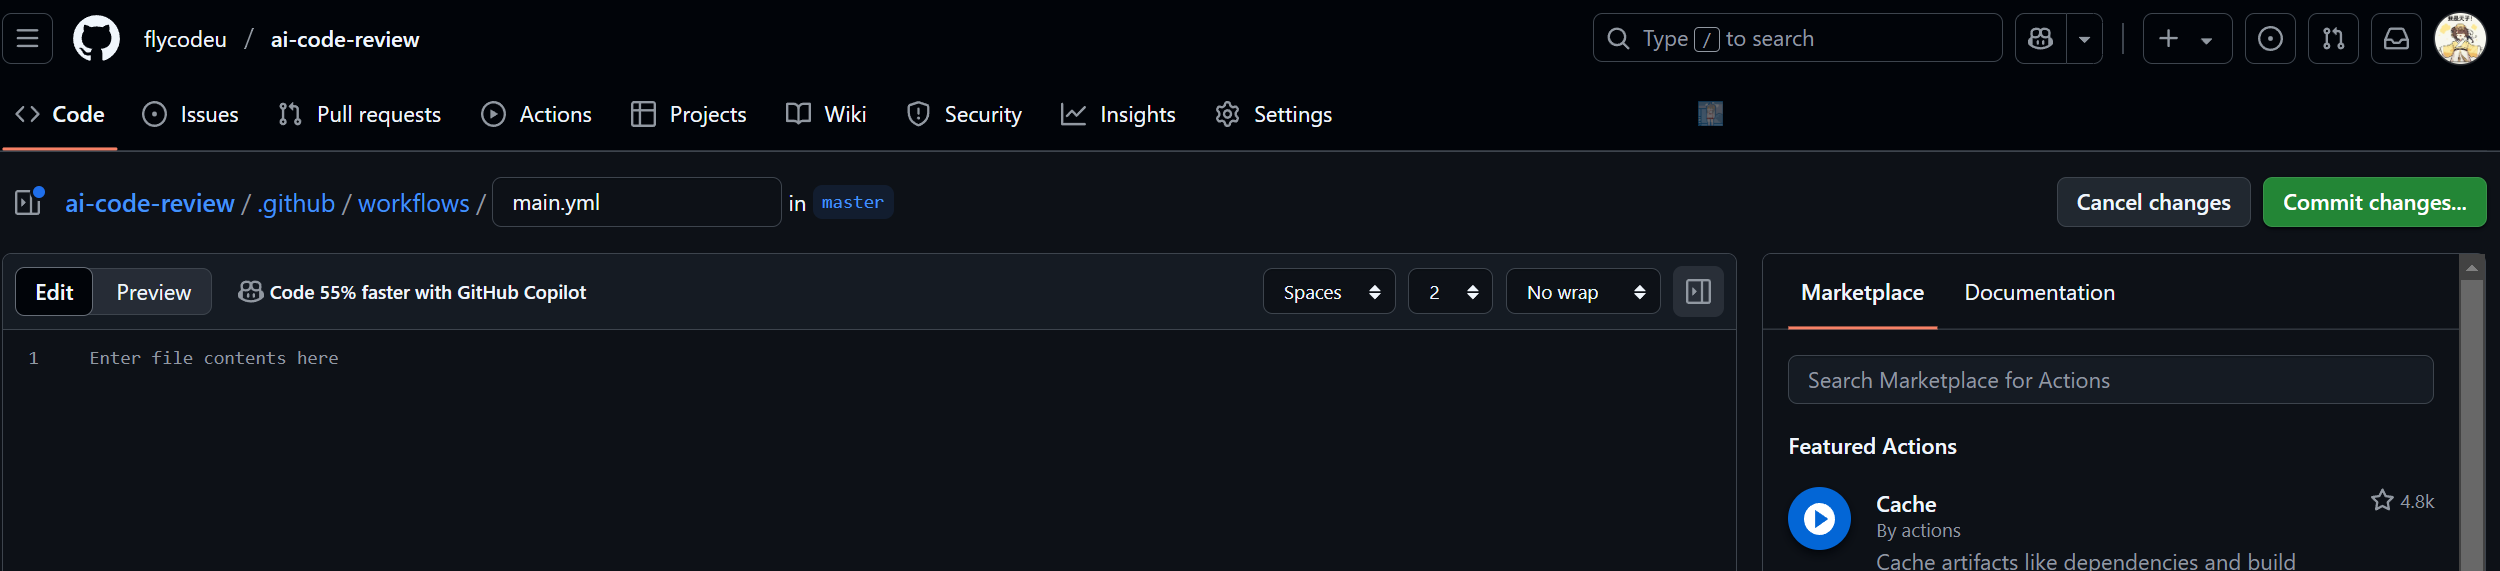
2. 创建Maven事件流
会自动将Maven项目打包,然后读取配置的Token环境执行命令。
name: Build and Run OpenAiCodeReview By Main Maven Jar
on:
  push:
    branches:
      - master
  pull_request:
    branches:
      - master
jobs:
  build:
    runs-on: ubuntu-latest
    steps:
      - name: Checkout repository
        uses: actions/checkout@v2
        with:
          fetch-depth: 2

      - name: Set up JDK 11
        uses: actions/setup-java@v2
        with:
          distribution: 'adopt'
          java-version: '11'
      # maven构建
      - name: Build with Maven
        run: mvn clean install
      # 复制AI自动评审组件jar包到Github服务器的libs目录下
      - name: Copy openai-code-review-sdk JAR
        run: mvn dependency:copy -Dartifact=icu.flycode:ai-code-view:1.0 -DoutputDirectory=./libs

      - name: Run OpenAiCodeReview
        run: java -jar ./libs/ai-code-view-1.0.jar
        env:
          GITHUB_TOKEN: ${{ secrets.CODE_TOKEN }}
上面artifactId、version是根据自己项目的pom文件里面配置
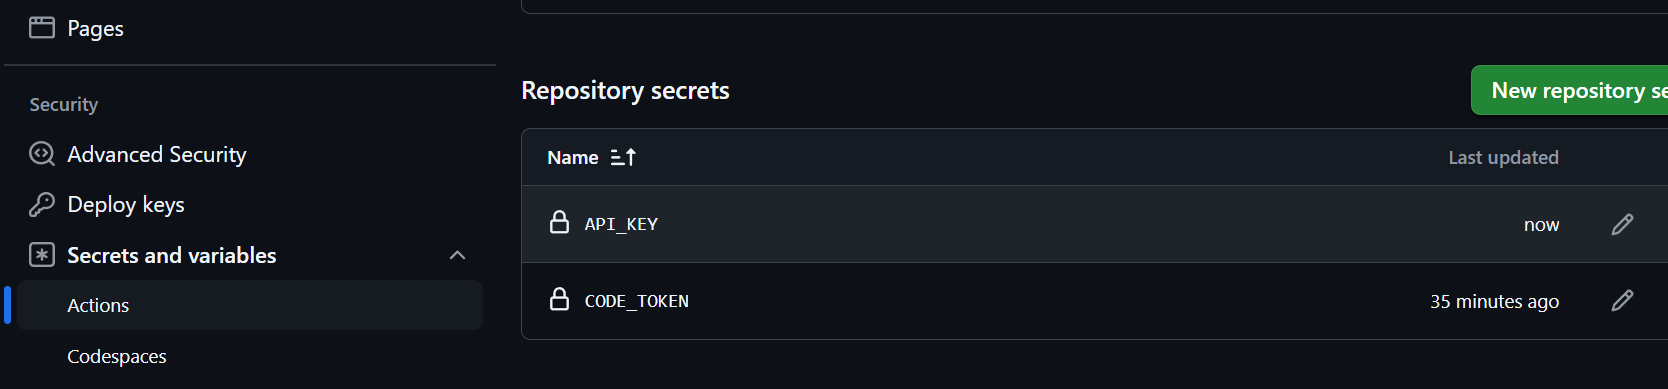
3. 配置Token
在当前项目创建密钥CODE_TOKEN,对应着上面的secrets

4. 读取env环境
    public static String getEnv(String key) {
        String token = System.getenv(key);
        if (null == token || token.isEmpty()) {
            throw new RuntimeException(key + ":value is empty");
        }
        return token;
    }
5. 测试日志功能
这个Env就是之前配置GITHUB_TOKEN
// 7. 创建仓库文件
String codeToken = getEnv("GITHUB_TOKEN");
String s = writeLogs(codeToken, "hello");
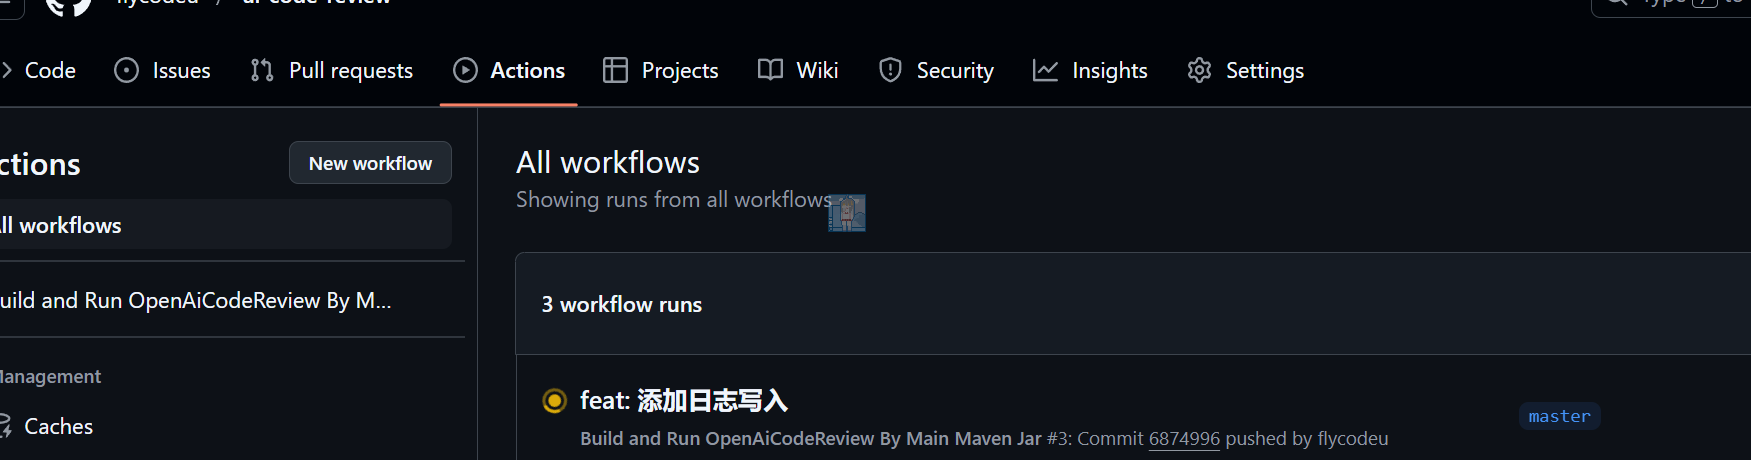
System.out.println(s);6. 提交代码
我们可以在当前项目的Actions查看执行状态
7. 运行截图
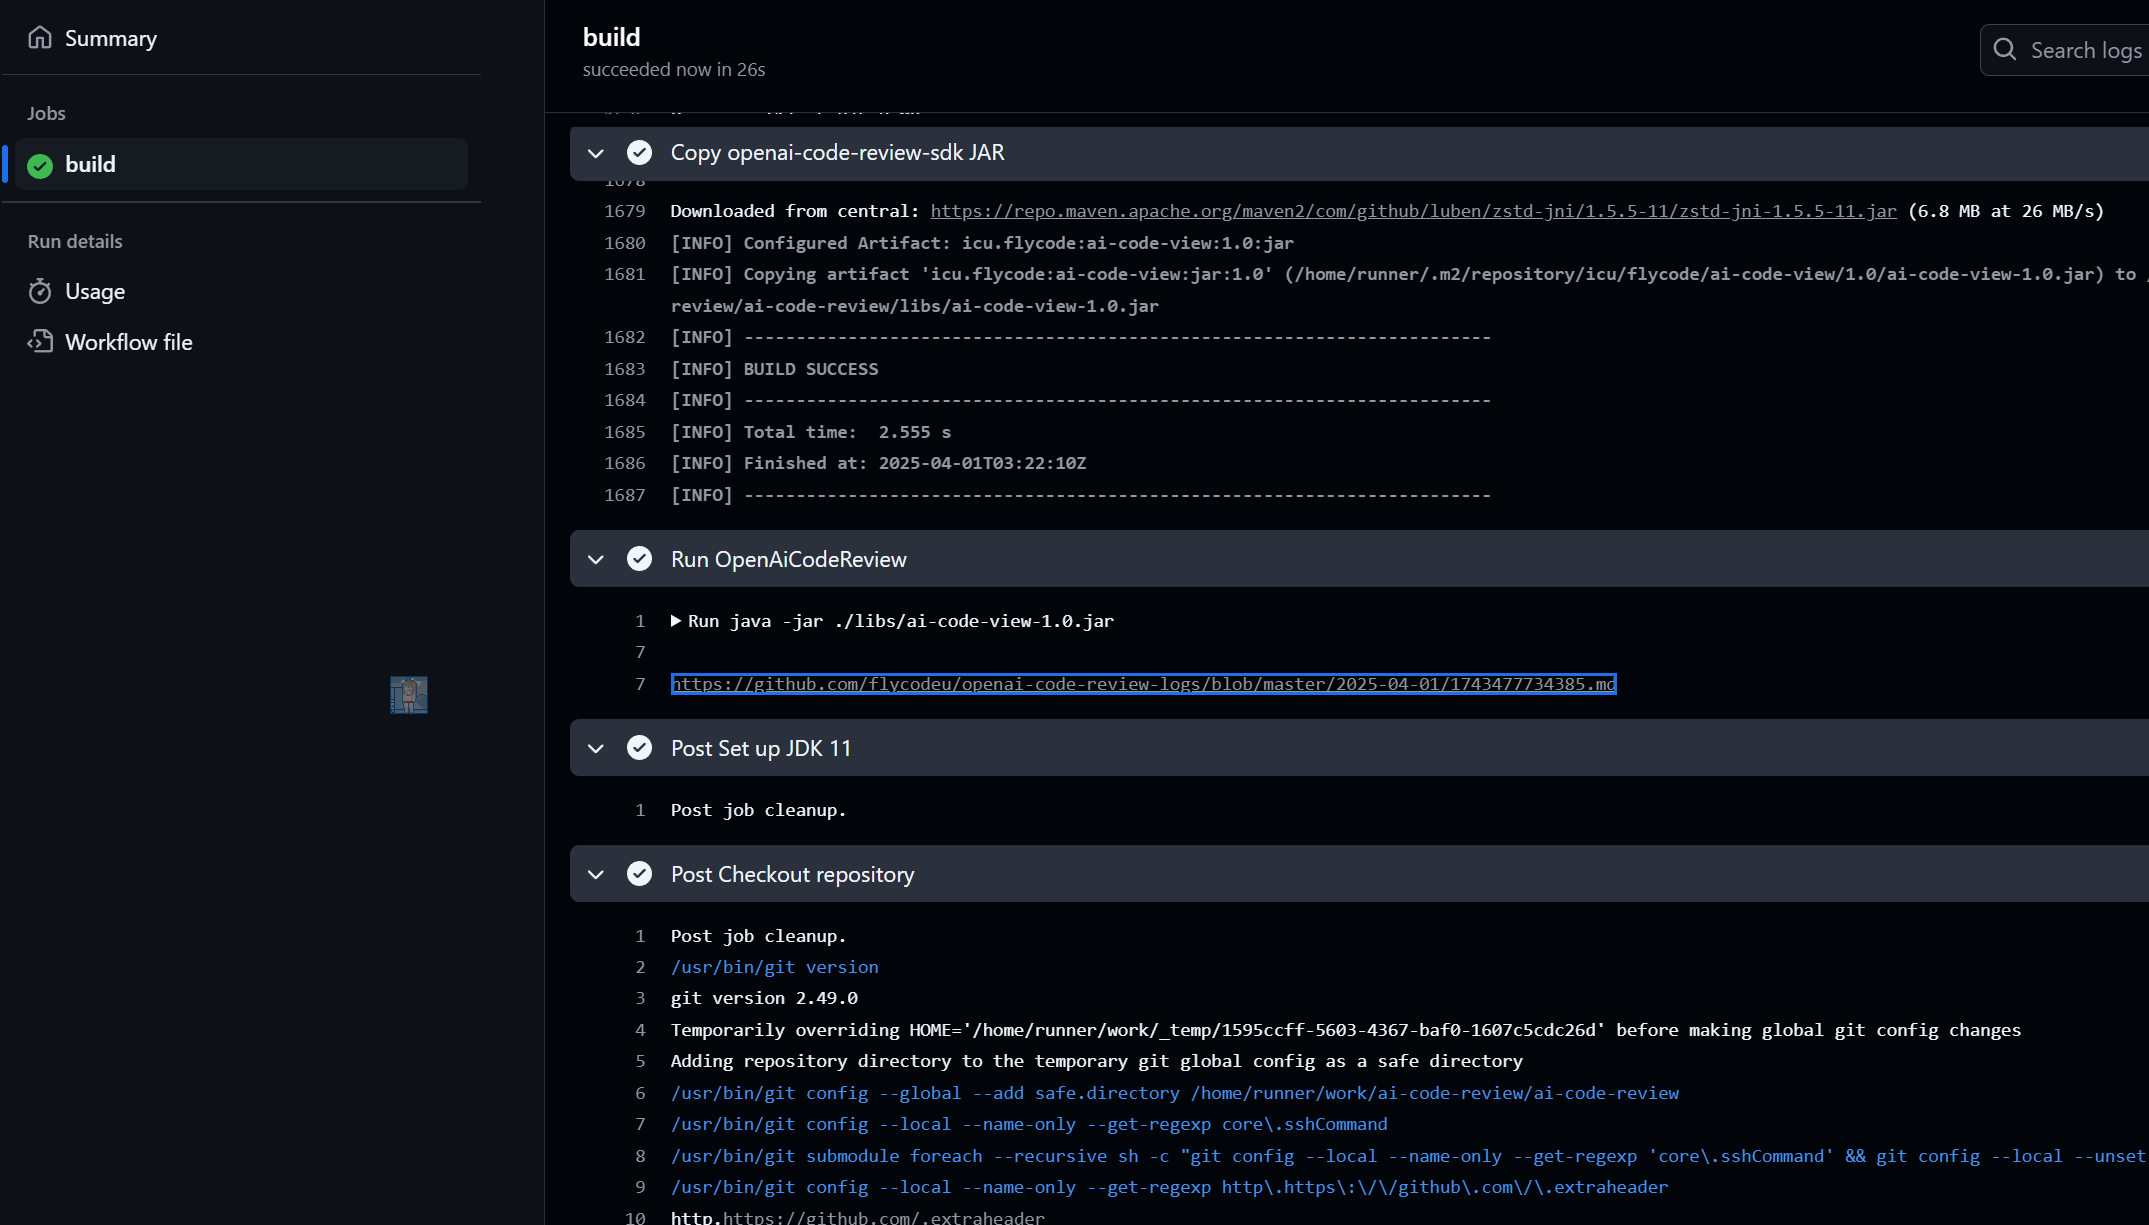
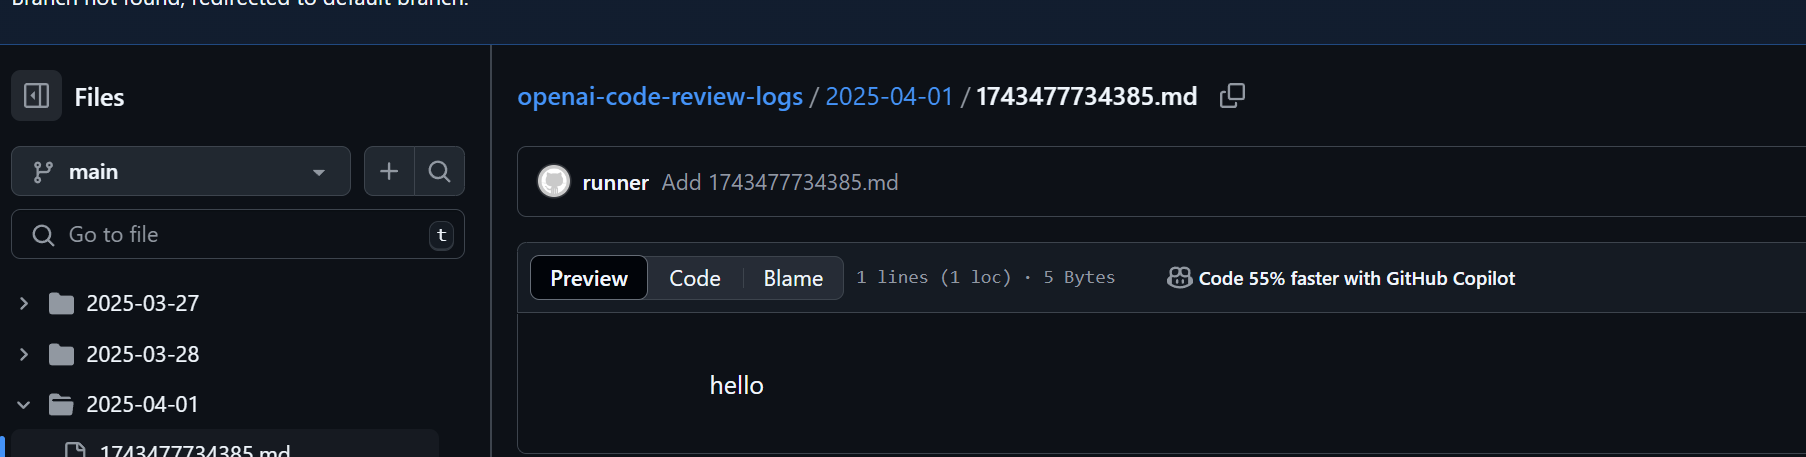
成功创建文件。
6. 整合功能
同样的我们需要将API_KEY也通过Actions来获取
name: Build and Run OpenAiCodeReview By Main Maven Jar
on:
  push:
    branches:
      - master
  pull_request:
    branches:
      - master
jobs:
  build:
    runs-on: ubuntu-latest
    steps:
      - name: Checkout repository
        uses: actions/checkout@v2
        with:
          fetch-depth: 2

      - name: Set up JDK 11
        uses: actions/setup-java@v2
        with:
          distribution: 'adopt'
          java-version: '11'
      # maven构建
      - name: Build with Maven
        run: mvn clean install
      # 复制AI自动评审组件jar包到Github服务器的libs目录下
      - name: Copy openai-code-review-sdk JAR
        run: mvn dependency:copy -Dartifact=icu.flycode:ai-code-view:1.0 -DoutputDirectory=./libs

      - name: Run OpenAiCodeReview
        run: java -jar ./libs/ai-code-view-1.0.jar
        env:
          GITHUB_TOKEN: ${{ secrets.CODE_TOKEN }}
          API_KEY: ${{ secrets.API_KEY}}
public static void main(String[] args) throws Exception {
// 1. 作者名
String author = getGitInfo("%an");
System.out.println("Author: " + author);
// 2. 日期
String date = getGitInfo("%cd");
System.out.println("Date: " + date);
// 3. 描述
String description = getGitInfo("%s");
System.out.println("Description: " + description);
// 4. 哈希值,用于获取提交代码
String hashCode = getGitInfo("%h");
System.out.println("Hash Code: " + hashCode);
// 5. 获取提交代码
String diffCode = getDiffCode(hashCode);
System.out.println(diffCode);
// 6. 代码评审
String apikey = getEnv("API_KEY");
String codeReview = getCodeReview(apikey, diffCode);
// 7. 创建仓库文件
String codeToken = getEnv("GITHUB_TOKEN");
String s = writeLogs(codeToken, codeReview);
System.out.println(s);
}7. 消息通知
每次执行完成后,我们需要有对应的通知,告诉我们执行的结果,例如微信公众号、邮箱、短信等等。
我们目前可以使用微信的测试公众号实现消息通知功能,后续可以考虑在本地实现。
1. 微信测试公众号
可以临时使用微信公众号,添加测试模板,实现消息推送功能。
http://mp.weixin.qq.com/debug/cgi-bin/sandboxinfo?action=showinfo&t=sandbox/index


调用地址:https://mp.weixin.qq.com/debug/cgi-bin/readtmpl?t=tmplmsg/faq_tmpl
我们只需要按照这种格式发送请求给微信即可。
我们需要获取如下信息:
- appId
- secret
- template_id(模板id)
- to_user(推送给关注当前公众号的用户id)
2. 获取token
https请求方式: GET
https://api.weixin.qq.com/cgi-bin/token?grant_type=client_credential&appid=APPID&secret=APPSECRET
我们可以按照这种格式发送请求给微信,获取token
/**
* 获取微信token
*/
public class WxTokenUtils {
private String appId;
private String secret;
private static final String GRANT_TYPE = "client_credential";
private static final String URL_TEMPLATE = "https://api.weixin.qq.com/cgi-bin/token?grant_type=%s&appid=%s&secret=%s";
/**
* 获取token
*
* @param appId
* @param secret
* @return
*/
public String getAccessToken(String appId, String secret) {
String urlStr = String.format(URL_TEMPLATE, GRANT_TYPE, appId, secret);
try {
URL url = new URL(urlStr);
HttpURLConnection httpURLConnection = (HttpURLConnection) url.openConnection();
httpURLConnection.setRequestMethod("GET");
int responseCode = httpURLConnection.getResponseCode();
System.out.println("responseCode = " + responseCode);
if (responseCode == HttpURLConnection.HTTP_OK) {
BufferedReader bufferedReader = new BufferedReader(new InputStreamReader(httpURLConnection.getInputStream()));
String line;
StringBuilder content = new StringBuilder();
while ((line = bufferedReader.readLine()) != null) {
content.append(line);
}
bufferedReader.close();
System.out.println("content = " + content);
Token token = JSON.parseObject(content.toString(), Token.class);
return token.getAccess_token();
}
} catch (IOException e) {
throw new RuntimeException(e);
}
return null;
}
/**
* 返回的JSON数据格式
*/
@Data
public class Token {
/**
* 获取到的凭证
*/
private String access_token;
/**
* 凭证有效时间,单位:秒
*/
private String expires_in;
}
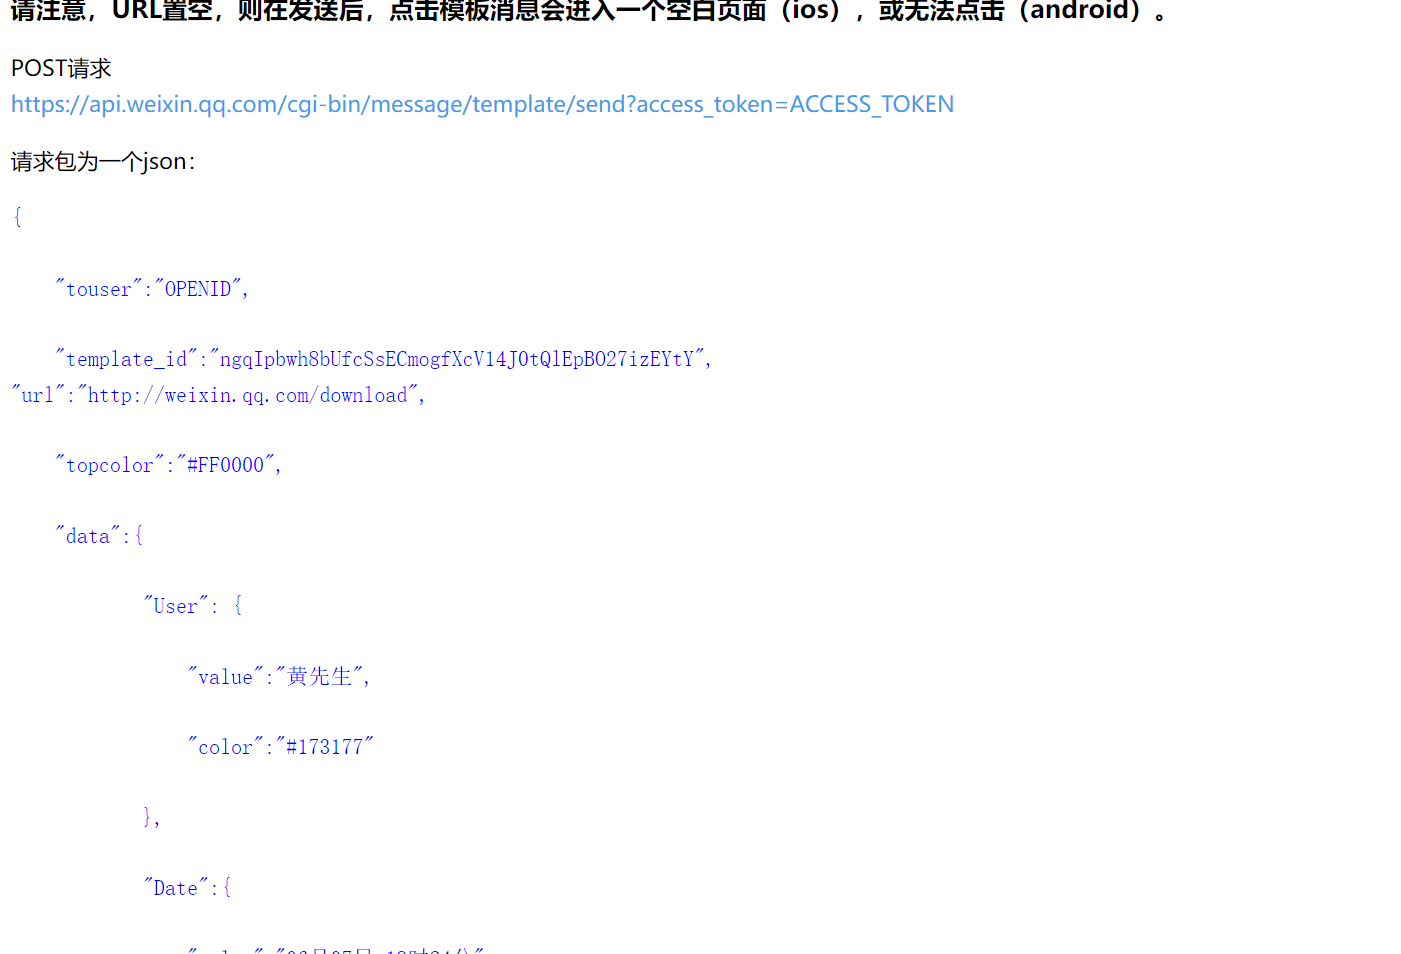
}3. 创建消息模板
POST请求
https://api.weixin.qq.com/cgi-bin/message/template/send?access_token=ACCESS_TOKEN
{
    "touser":"OPENID",
    "template_id":"xxxx",
	"url":"xxxx",
    "data":{
            "repo_name":{
                "value":"code"
            },
            "branch_name":{
                "value":"master"
            },
            "commit_author":{
                "value":"flycode"
            },
            "commit_message":{
                "value":"提交代码"
            }
    }
}
我们首先需要创建一个枚举值,用来标识每一个key。
package icu.flycode.sdk.domain.enums;

/**
 * 模板key
 */
public enum TemplateKey {
    REPO_NAME("repo_name", "项目名称"),
    BRANCH_NAME("branch_name", "分支名称"),
    COMMIT_AUTHOR("commit_author", "提交用户"),
    COMMIT_MESSAGE("commit_message", "提交信息");

    private String code;
    private String desc;

    TemplateKey(String code, String desc) {
        this.code = code;
        this.desc = desc;
    }

    public String getCode() {
        return code;
    }

    public String getDesc() {
        return desc;
    }
}
根据以上格式,我们可以设置如下的模板消息
/**
 * 模板消息
 */
@Data
public class TemplateMessage {
    /**
     * 发送者id
     */
    private String touser;

    /**
     * 模板id
     */
    private String template_id;

    /**
     * 跳转url
     */
    private String url;

    /**
     * 存储数据
     */
    private Map<String, Map<String, String>> data = new HashMap<>();

    /**
     * 存放key-value数据
     *
     * @param key
     * @param value
     */
    public void put(String key, String value) {
        data.put(key, new HashMap<String, String>() {{
            put("value", value);
        }});
    }
}
4. 模板消息发送
    public static void pushWxMessage(String logUrl) throws IOException {
        // 1. 获取token
        String appId = "";
        String sercet = "";
        String accessToken = WxTokenUtils.getAccessToken(appId, sercet);
        // 2. 构建url请求
        String urlStr = "https://api.weixin.qq.com/cgi-bin/message/template/send?access_token=" + accessToken;
        URL url = new URL(urlStr);
        HttpURLConnection httpURLConnection = (HttpURLConnection) url.openConnection();
        httpURLConnection.setRequestMethod("POST");
        httpURLConnection.setRequestProperty("Content-Type", "application/json; utf-8");
        httpURLConnection.setRequestProperty("Accept", "application/json");
        httpURLConnection.setDoOutput(true);

        // 3. 编写请求数据
        TemplateMessage templateMessage = new TemplateMessage();
        templateMessage.setTouser("");
        templateMessage.setTemplate_id("");
        templateMessage.setUrl(logUrl);


        templateMessage.put(TemplateKey.REPO_NAME.getCode(), "code review");
        templateMessage.put(TemplateKey.COMMIT_AUTHOR.getCode(), "flycodeu");
        templateMessage.put(TemplateKey.COMMIT_MESSAGE.getCode(), "测试");
        templateMessage.put(TemplateKey.BRANCH_NAME.getCode(), "master");

        try (OutputStream os = httpURLConnection.getOutputStream()) {
            byte[] bytes = JSON.toJSONString(templateMessage).getBytes(StandardCharsets.UTF_8);
            os.write(bytes, 0, bytes.length);
        }

        // 4. 发送请求并获取响应
        try (Scanner scanner = new Scanner(httpURLConnection.getInputStream(), StandardCharsets.UTF_8.name())) {
            String response = scanner.useDelimiter("\\A").next();
            System.out.println(response);
        }
    }
5. 测试调用
        String url = "https://github.com/flycodeu/openai-code-review-logs";
        pushWxMessage(url);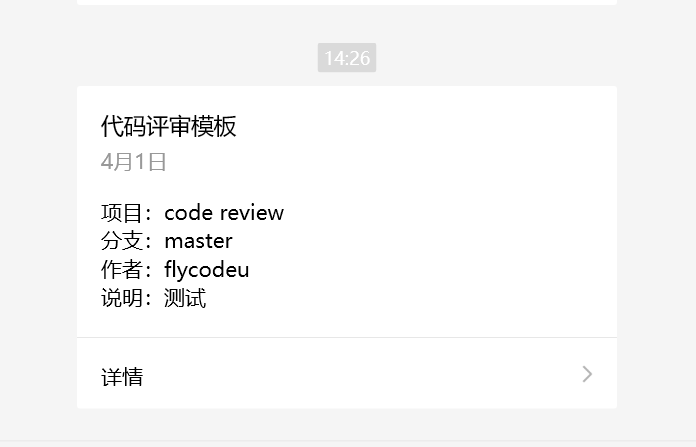
点击当前消息,即可跳转到对应的仓库日志地址。
8. 功能整合

我们可以看到当前的项目是比较臃肿的,所有的代码都在AICodeReview里面,我们需要抽离出代码。
主要分成五个部分
- (Git)基础信息:项目名、提交者、日期、提交描述
- (Git)提交的历史修改记录
- AI代码评审
- (Git)创建仓库日志
- 调用消息模板
根据类型可以归类成三个部分
- Git操作
- AI评审
- 微信消息模板
微信模板消息是用户可选的,如果用户选择了,才需要用户提交模板id,用户id等相关信息。
Git相关配置信息,我们可以从Actions中获取,例如分支、仓库名、作者、消息描述、token
AI评审:需要记录AI的apiKey以及Host请求,最终目标可以兼容多个AI模型。
需要在当前项目里面添加如下配置
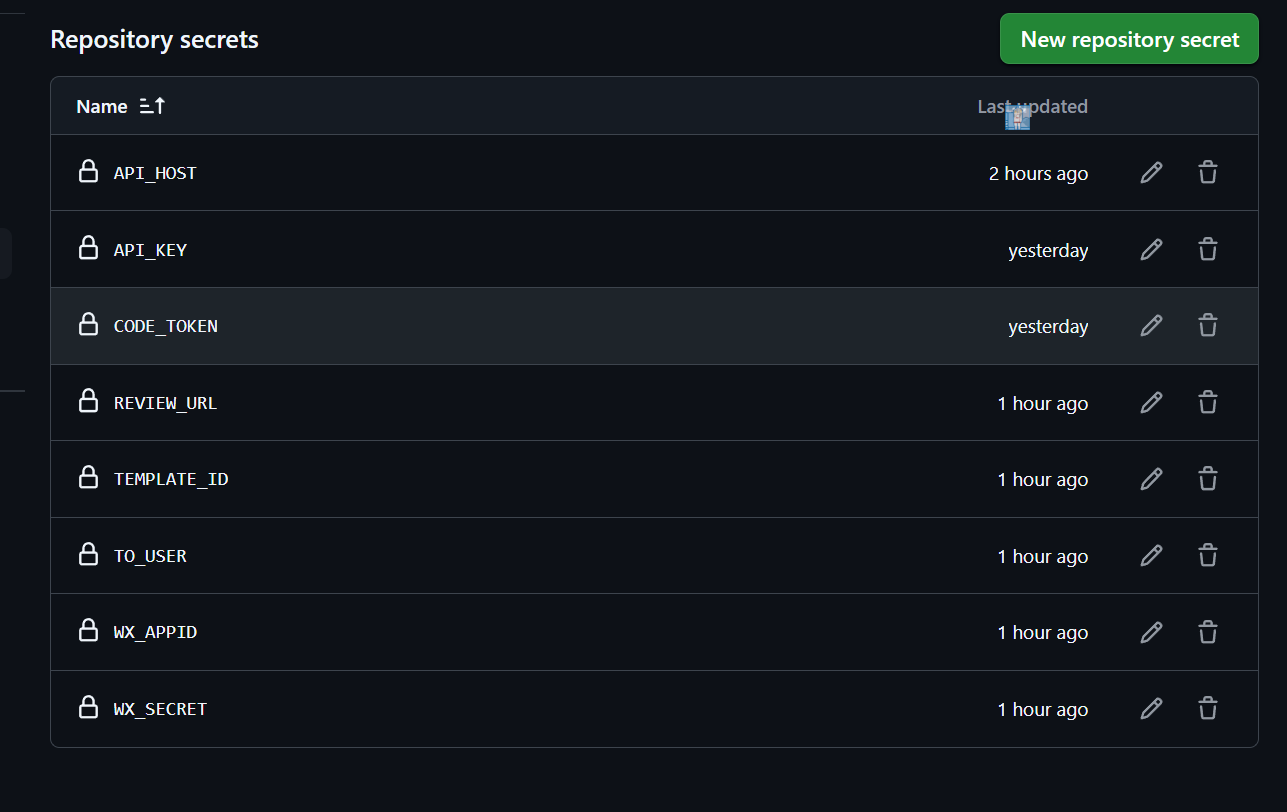
第一阶段的本地代码评审已经完成,后续将会改造为插件或者依赖,其余用户只需要引入,填写自己的密钥信息,即可自动执行。
贡献者
flycodeu
版权所有
版权归属: